BCMS reporting for masses, part 2: Historical Statistics
I am continuing the topic started in previous post, regarding cheap and simple BCMS statistics usage for a call center. In this part, we will use standard Avaya Site Administration software for report collection and Apache HTTP Server for report distribution. It is not very hard to implement this and process is not too complicated but will require software installation rights–or Administrator account–to do it so if you’re not sure you have those permissions you may have to ask your system administrator about it. One possible way is to dedicate some older lowly computer solely for this task, set it up once with administrator’s help and let users in on it.
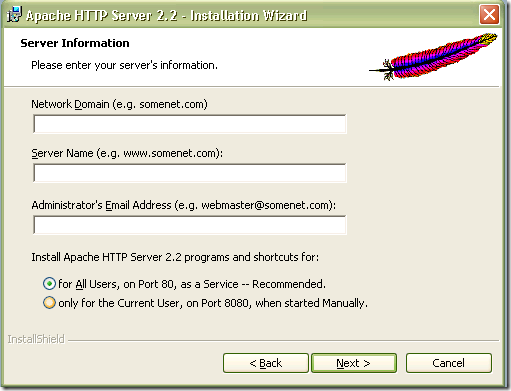
I assume you should have Avaya Site Administration already installed on your PC, and Apache HTTP Server you can download here: Download – The Apache HTTP Server Project. You can download any stable version available–at the time of writing this post, the latest is 2.2.15–it does not really matter since we will only be using some of the most basic features. After downloading, double click on the MSI file to run setup, click Next, accept license terms and click Next, and click Next again. This will bring you to the following Server Information screen:
The information you can enter on this screen is not all too important since you can always change it later in the configuration file. However, the bottom option is somewhat important. As you can see, Apache can be installed either as a service or as ordinary application. If you install it as service, Apache will start automatically every time Windows starts, without waiting for user to login on that PC, and will start serving pages immediately. This way it is best used in production environment, when everything is already set up. If you intend to install Apache on your PC and play with it but not use it seriously, better use “only for Current User” option. I will use “Current User” option for this article since I have no intention of putting this reporting system in production.
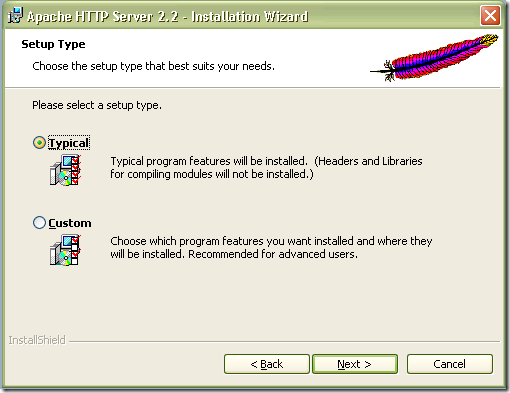
Fill in something in other fields, examples given in parentheses will do. Click Next, you will see Setup Type screen:
Leave it at Typical and click Next:
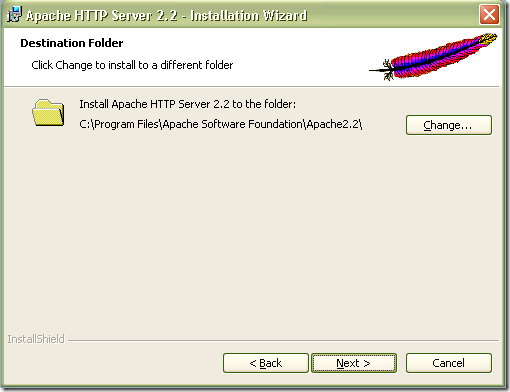
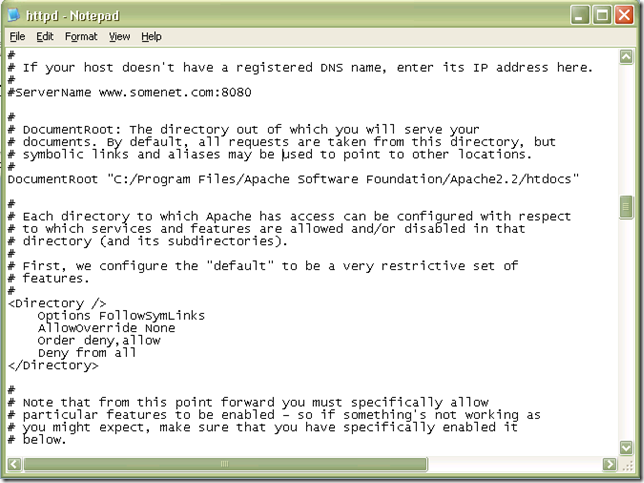
Choose a folder you will like Apache to be installed in, or just leave default, and click Next. The wizard will tell you that it’s ready to install, click Install. After installation is finished, click Finish. That’s all for setup, now it is time to configure Apache. It is done by manually changing its configuration file, accessed by menu item Start – All Programs – Apache HTTP Server – Configure Apache Server – Edit the Apache httpd.conf Configuration File. When you click on that menu item, chances are that Windows won’t be able to do anything because it doesn’t know what to do with .conf file types and will offer you to either search Web or select a program. Choose “select a program” and use standard Notepad for editing this file. There is a lot of different options, most of them documented right there in the configuration file–lines starting with # are commentary and ignored by Apache–but in the simplest case, you won’t even need to change anything. What we opened this file for, is to see where the DocumentRoot is located. Use Edit – Find option in Notepad menu (or just press Ctrl-F), type in DocumentRoot and OK it. Notepad should find the first line with this word and highlight it. It should look like this:
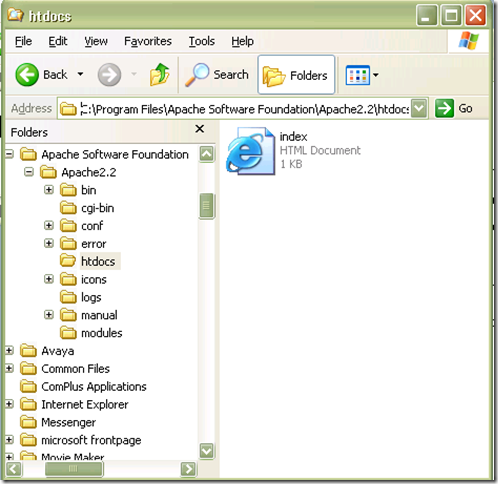
In my case, DocumentRoot is relative to Apache installation directory and is set to “C:/Program Files/Apache Software Foundation/Apache2.2/htdocs”. This is the directory we will use to store our historical reports to. Copy it, open up Windows Explorer and paste this path into its Address field and press Enter or click green Go button to open this directory. In my case, there is only one file there and it is named index.html:
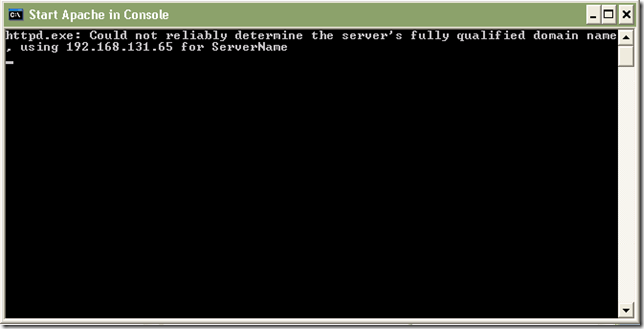
Next, start Apache by clicking Start menu – All programs – Apache HTTP Server – Control Apache Server – Start Apache in Console. A black DOS-like window should appear, there may be some warnings or errors but you should not encounter anything serious enough to prevent Apache from starting. If you do, please consult Apache documentation for troubleshooting your problem. In my case Apache only gave a warning that it cannot determine server’s FQDN name and will use IP address instead:
That’s all right for our purposes since we won’t use domain name for accessing this server anyway, at least not for this demonstration of possibility setup.
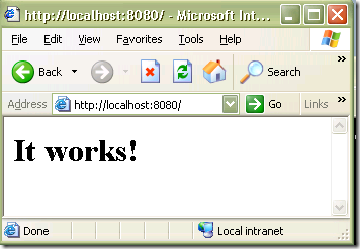
Essentially you have completed your Apache installation and now you can test it: open Internet Explorer or any other web browser and type in URL: http://localhost:8080. You should see a simple web page like this:
Yes, it is only there to tell you that HTTP server works, nothing more fancy than that. If you see any errors with this URL, try another one: http://127.0.0.1:8080–this actually is the same as localhost, latter being just a nickname for this IP address. The next step is to try IP address of your machine instead of “localhost” or its address, this is important since we want this server to be accessible not only on PC where it is installed but also from other machines as well. If everything is OK, fine. If not, check Windows Firewall first to see if incoming HTTP requests on port 8080 are blocked, then you may have to ask your system administrator for assistance. There are many possible problems with Web servers network connectivity, and their troubleshooting is not in the scope of this article. I will assume everything works as expected.
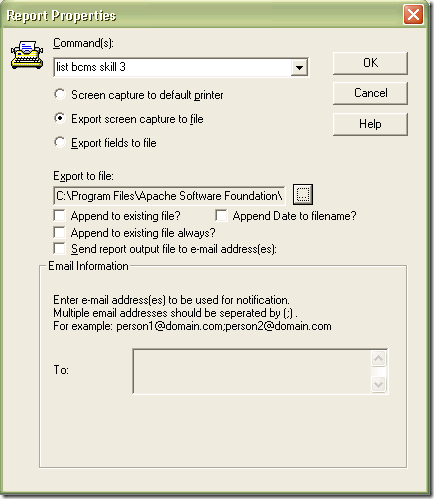
Next, create a folder in the Apache DocumentRoot directory, it’s not necessary but will give you more options later. I will name my directory “reports”. After doing that, you need to set up a schedule (or several) for BCMS reports in Avaya Site Administration. This is done as usual with System – Advanced – Report menu item (or Ctrl-R). Enter command you need, in my case it was “list bcms skill 3”, click “Export screen capture to file” option and “…” button to select file name to be saved. I set this to “C:\Program Files\Apache Software Foundation\Apache2.2\htdocs\reports\list_bcms_skill_3.txt”–remember DocumentRoot and directory we created earlier? You need to save reports to that directory if you want them to be served by Apache. Now, the Report Properties dialog should look like this:
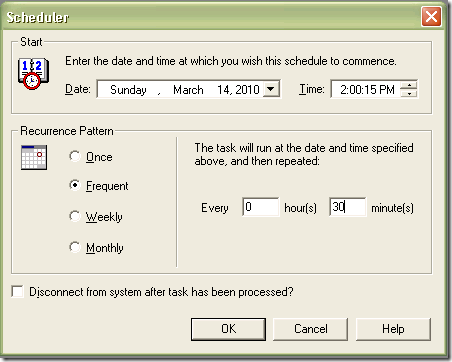
Click OK and select this report frequency. I’d recommend running it once in BCMS interval, once in an hour or 30 minutes, depending on your PBX settings and your call center manager’s preferences. Starting time is best like several seconds after beginning of next interval, I’m writing this at 1:45PM so my next logical choice will be 2:00:15PM. I assume you have 30-minute interval so this report should be run once in 30 minutes and Scheduler dialog box should finally look like this:
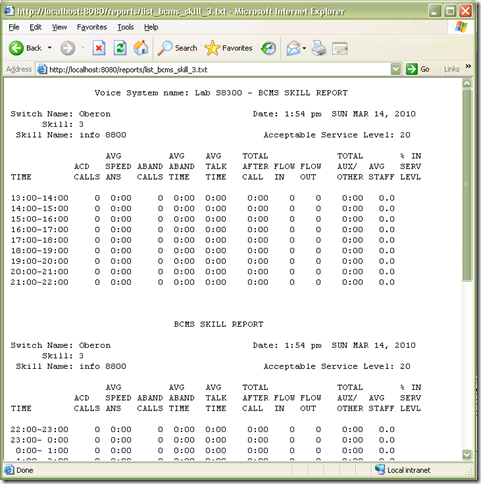
Now click OK and you’re all set. Don’t believe me? Try it yourself: in ASA, choose Schedule tab at the bottom, right click on the report schedule you’ve just created and click Run Now. ASA should run this report and save it as file. No, don’t bother opening it as text file in Notepad, use web browser instead: http://localhost:8080/reports/list_bcms_skill_3.txt. See this? It worked:
Well, almost. :) As you can see, this report has all its data zeroed out but as I’m running this report on my lab PBX, there shouldn’t be any actual data there. You should see something more lively in that report, if you have BCMS set up correctly. If not, set it up and it’ll work. It’s delivery system we’re more concerned with in our example, not report generation.
So you have scheduled your reports and set up their delivery using Web browser, now it’s time to think it over properly. To do it right and convenient, most probably you will need to run several–probably many–reports for every skill group you have, save them to different directories and set different access rights on these using Apache configuration file or local .htaccess files. Maybe even add HTML or SHTML wrapper for TXT files to ensure they’re displayed the way you wanted, have auto-refresh and other features. This is all more Apache and HTML related than BCMS and call center related so I will leave it at your discretion.
Hey Dwalin,
Nice work!!!
Great to see you’re still around on the Avaya kit.
Have done some nice stuff with your ECHI script.
Did you do some stuff with CLINT yet????
I got some nice stuff ypu prob would like for a neat terminal interface to CM
Hi Edwin,
Thanks. :) No, I haven’t got time to play around with CLINT yet, though I have some plans for it. And if your nice stuff is OSSI terminal manual, I’d like to have it. :)
Very cool! I just bookmarked it too so I look forward to seeing more.
Helo there, well I find that your writing is rather observant with an assorted range of insightful data. By the way, was thinking whether you would love to interchange web links with my site, as I am looking to build web links to further spearhead and gain ground for my site. I do not mind you setting my web links at the main page, just accepting this web links on this page is more than enough. Anyway, please reach me at my website if you are interested in exchanging links with me, I would really appreciate that. Thank you very much and hopefully to get a reply from you as soon as possible!
Considering that Nortel is now part of Avaya, why not? :)
Looking for some way somhow to run bcms reporting without concern that I would loose some in case site admin application should close. Any way around this ?
five,
No simple way that I know of, except possibly restarting ASA every hour or so by Windows scheduler. On the other hand, ASA is pretty much stable application and if you plan to use this kind of reporting in production environment, it may be best to dedicate a PC – or virtual PC – for this task, set it up once and not touch it again.
I’m happy I found this blog site, I couldnt discover any info on this subject matter before. thanks
Morgan, you’re most welcome. And you know, the lack of information is the cause for this blog to appear.
Boy, some great info here. I really like the way you put things out there.
New to Avaya, so will keep looking around. Started out bu looking for IP406 office/voicemail pro for why I am offline and can’t get it to go online.
Thanks again for the good read.
Nice tutorial…. thanks !!!
HI Dwalin,
i am using BCMS and how to get agent sign in and sign out report. Please update me
Hi Danish,
You can’t get agent login/logout report, BCMS does not track this data. You will need CMS system for that.
Regards,
Alex.