Tutorial: Copying files to and from CMS with PSCP
When I was working for Avaya business partner building call centers, one of the most frequent questions of my customers was: how do you copy files to and from CMS? Every time I had to go to explanations and wished I just had a tutorial I could point people to. Now, here it is.
In fact, copying files between CMS and PC is quite trivial operation when you know how to do it; one of the benefits of learning how to do it is that you can reuse this knowledge for about any UNIX or Linux based system out there. It works the same with Communication Manager servers, Mosaix dialer, Modular Messaging and whatever other systems you may have, so it’s quite useful skill.
In order to copy files between dissimilar systems, we need to use a tool that works the same on both sides. The standard tool for this purpose is SCP which stands for Secure Copy. SCP is an utility that comes with Secure Shell (SSH) software package; on the UNIX side it is usually already there and on Windows side there is wide choice of packages to choose from. I mostly use PSCP which is free program that comes with PuTTY package, and this tutorial is about PSCP as well.
In order to use PSCP in an easy way you need to set up PuTTY first: (link). I recommend that you name your CMS session in short and efficient way, like “cms”. This will save you a lot of typing later on.
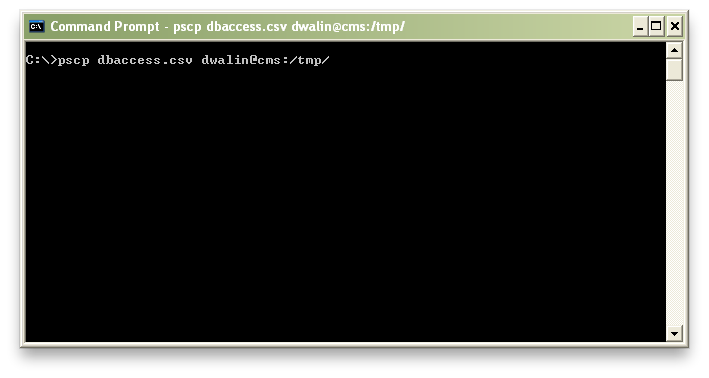
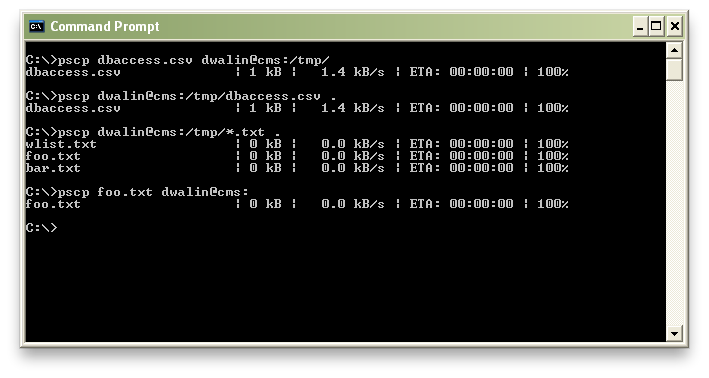
Now, setting up PuTTY session is about the hardest part, after that PSCP should just work. You can then use it to copy files to CMS:
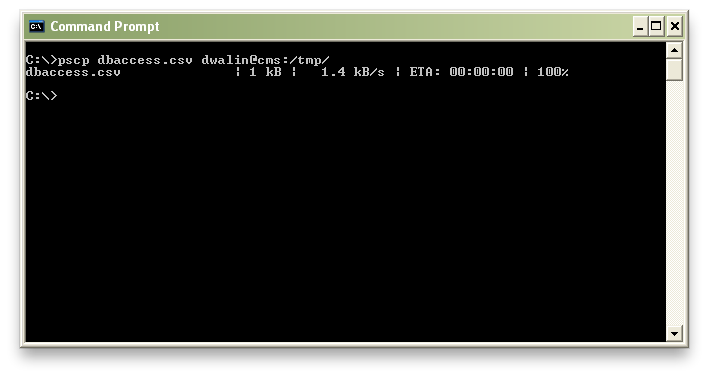
First parameter is file name; use full path when file is not in current directory. Second parameter tells PSCP where to put the file, in this case to login to server ‘cms’ using account ‘dwalin’ and put the file in ‘/tmp/’. You can omit user name if you have already configured auto-login username in CMS session; I just use it every time because I do a lot of file copying all the time and it’s easier to type login every time than keep track of whether I have configured it or not. While the file is copied, PSCP displays progress bar with time estimation (can be turned off with -q option); and when the file is copied it just quits:
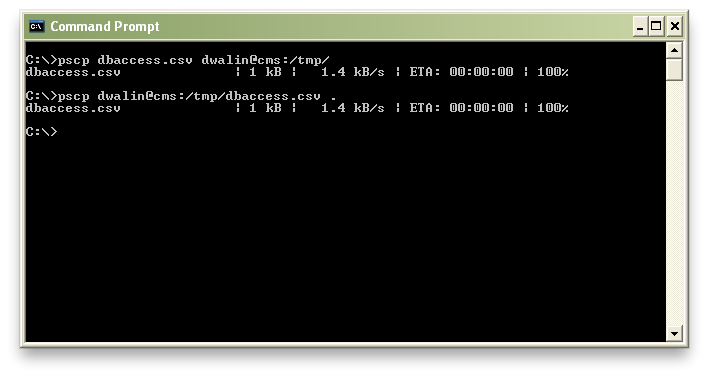
To copy files from CMS to your PC, do the reverse:
Now first parameter is login@host:/where/from and the second parameter is where to; in this case I wanted the file to be stored to current directory so I used a dot (which means current directory).
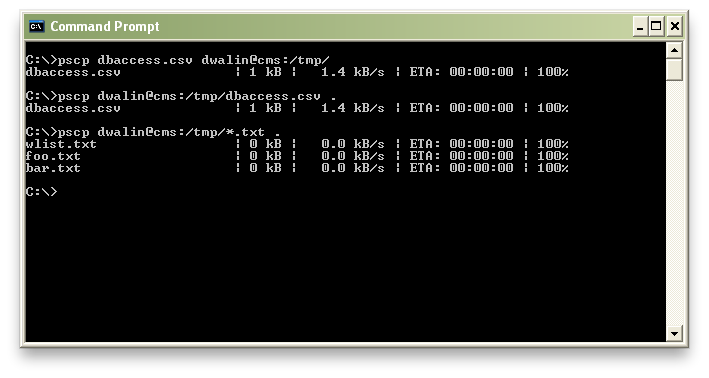
You can also copy several files in one batch, or do a full copy of a directory with subdirectories and files (using -r option), but that is less useful:
Oops, it seems that I accidentally copied not only the foo.txt and bar.txt I wanted to copy, but also wlist.txt which I know nothing about. Copying it from CMS did nothing bad except add to the junk I already have on my laptop; on the other hand when you copy files to CMS you can accidentally overwrite existing file. This may even become dangerous if you get into a habit of using root account for SCP; root can do literally anything in UNIX and any file will get overwritten without second thought. To avoid nasty surprises, always work from an ordinary account (cms is all right), and just save files in your home directory. Helpfully, it is even easier to do and requires less typing: if you omit file path in the server argument, PSCP will use home directory by default:
You may note that PSCP did not ask me for a password, this is because I used a session with symmetric key authentication. If you do not plan to use SCP file transfer too often you can skip it and just enter your password every time. For automated file transfers you can use -pw option with PSCP, but it is better to set up key authentication; you can find a description of how to do it in this article: (link).
Well, that’s about it for today.
It is much easier to use SFTP client (line WinSCP) to pull files from CMS. No need to install SSH service on Windows.